Configuring SAML SSO with Okta
This guide walks you through setting up SAML Single Sign-On (SSO) between Okta and Specmatic Insights.
Prerequisites
- Administrative access to Okta
- Administrative access to your Specmatic Insights instance
Step 1: Get SAML Configuration Values from Specmatic Insights
- In your Specmatic Insights instance, navigate to the SAML SSO configuration section.
- Copy the following values, which you'll need for the Okta configuration:
- Service Provider Entity ID:
https://insights.specmatic.io/saml2/<RANDOM_CHARACTERS> - Assertion Consumer Service URL/SSO Redirect URL:
https://insights.specmatic.io/login/saml2/sso/<RANDOM_CHARACTERS>
- Service Provider Entity ID:
Step 2: Create SAML Application in Okta
-
Log in to your Okta Admin Console.
-
Navigate to Applications > Applications.
-
Click Create App Integration.
-
Select SAML 2.0 and click Next.
-
Enter the application name (e.g., "Specmatic Insights") and click Next.
-
In the SAML Settings section, enter the values you copied from Specmatic Insights in Step 1:
- Single sign on URL:
https://insights.specmatic.io/login/saml2/sso/<RANDOM_CHARACTERS> - Ensure that the Use this for Recipient URL and Destination URL option is checked.
- Audience URI (SP Entity ID):
https://insights.specmatic.io/saml2/<RANDOM_CHARACTERS>
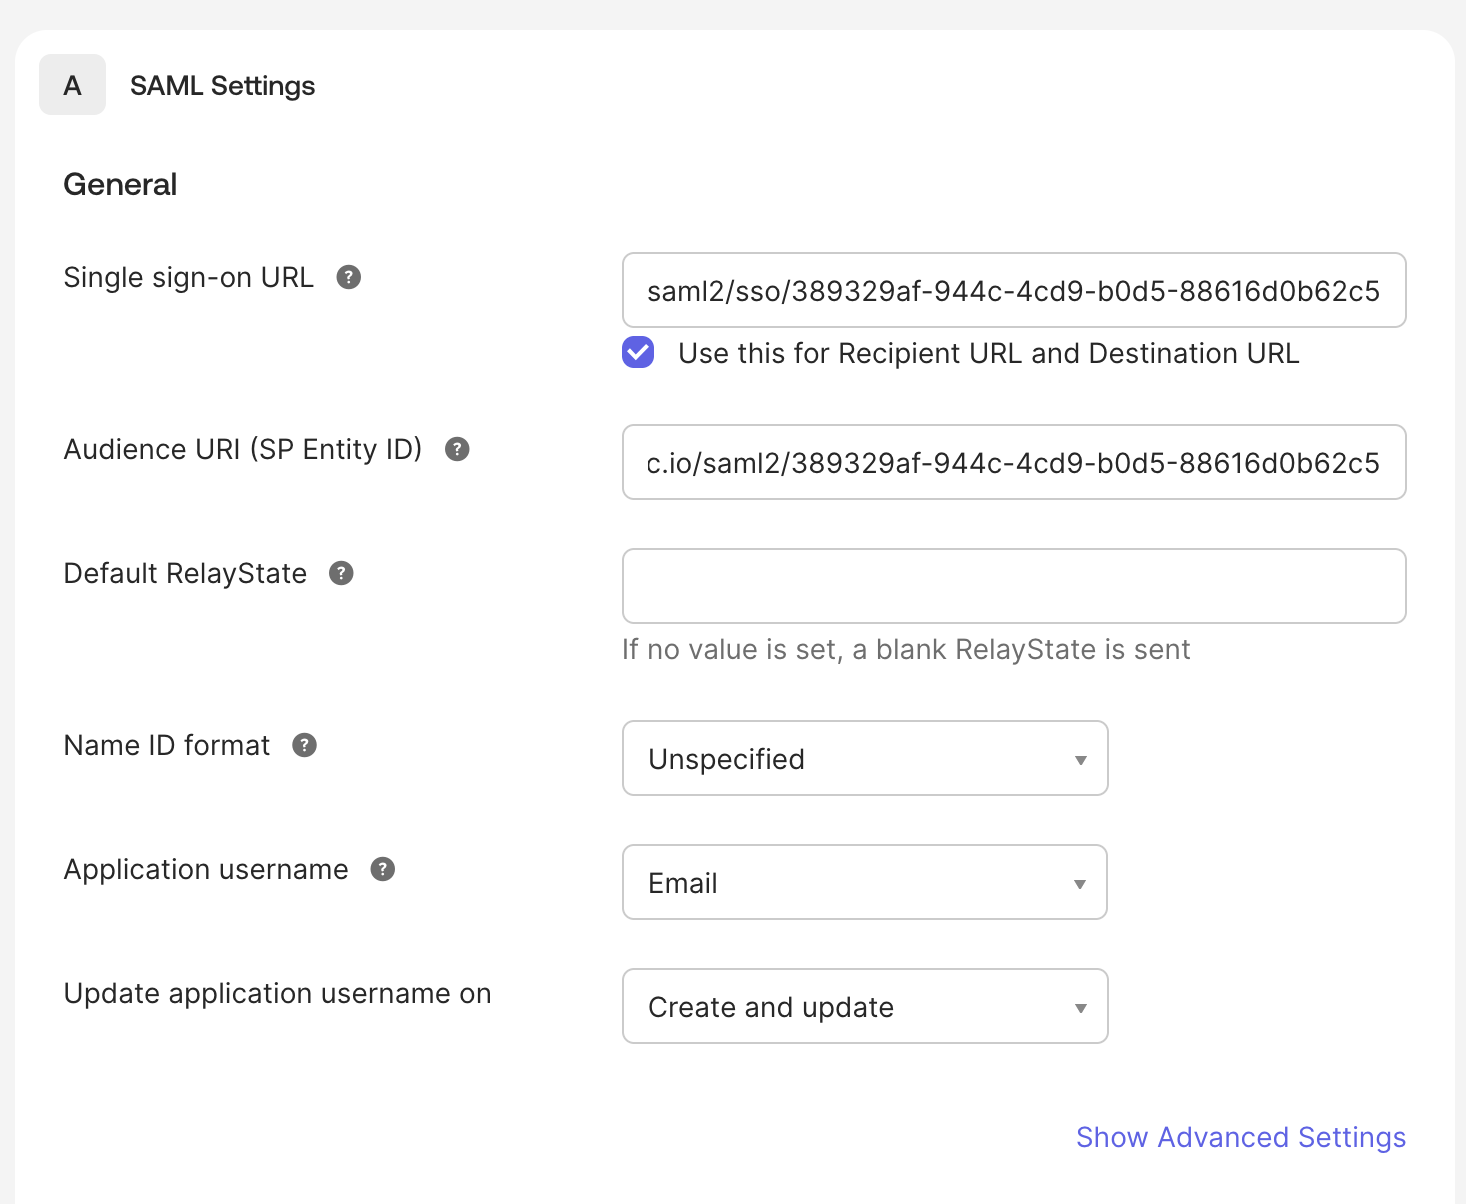 Figure 1: Configuring SAML Settings in Okta
 - Single sign on URL:
-
Ensure that the following attribute statements are configured:
- Name ID Format:
Unspecified - Application Username:
Email
- Name ID Format:
-
Click Next, then Finish to create the application.
Step 3: Get Okta configuration details and configure Specmatic Insights
- In your Okta application, go to the Sign On tab.
- Copy the Metadata URL from the SAML 2.0 section of the Okta application.
- Paste the Metadata URL from Okta into the Metadata URL field in Specmatic Insights SSO configuration.
- Copy the Issuer from the SAML 2.0 section of the Okta application.
- Paste the Issuer into the Identity Provider Entity ID field in Specmatic Insights SSO configuration.
- Enable SAML SSO and save the configuration.
Step 4: Assign users to the Okta application
- In your Okta application, go to the Assignments tab.
- Click Assign and choose Assign to People or Assign to Groups.
- Select the users or groups that should have access to Specmatic Insights.
- Click Assign to confirm the assignments.
- Click Done to finish the assignment process.
Step 5: Test the SAML SSO integration
- Open the Specmatic Insights login page.
- Click Sign in with SSO (or your org’s SSO option).
- Choose the Okta-backed SSO configuration if prompted.
- Sign in via Okta and confirm you are redirected back to Insights successfully.
Troubleshooting
Tip: If you encounter issues during setup or login, check the following common problems:
SAML Configuration Issues
- Invalid Entity ID or Reply URL: Double-check that the values from Specmatic Insights exactly match what's configured in Okta.
- Metadata URL not accessible: Ensure the Metadata URL from Okta is publicly accessible and correctly copied.
- Certificate issues: If using custom certificates, verify they are valid and properly configured.
User Access Issues
- User not assigned: Ensure users are assigned to the application in Okta (Step 6).
- User attributes missing: Verify that required user attributes (email, name) are being sent in the SAML response.
- User doesn't exist in Specmatic Insights: Some SSO configurations require users to be pre-created in the target application.
Authentication Flow Issues
- Redirect loops: Check that the Reply URL in Okta exactly matches the Assertion Consumer Service URL from Specmatic Insights.
- Invalid SAML response: Use browser developer tools to inspect SAML responses for error messages.
- Clock skew: Ensure system clocks are synchronized between Okta and Specmatic Insights servers.
Testing and Validation
- Use SAML tracer tools: Browser extensions like SAML-tracer can help debug SAML authentication flows.
- Check Okta sign-in logs: Review the sign-in logs in Okta admin center for error details.
- Verify Specmatic Insights logs: Check application logs for SAML processing errors.
For additional help with SAML SSO configuration, consult the Specmatic Insights documentation or contact Specmatic support.